NE-HCS12SS59T-R1 I2C VFD
Now on Tindie: I2C VFD display
What is it?
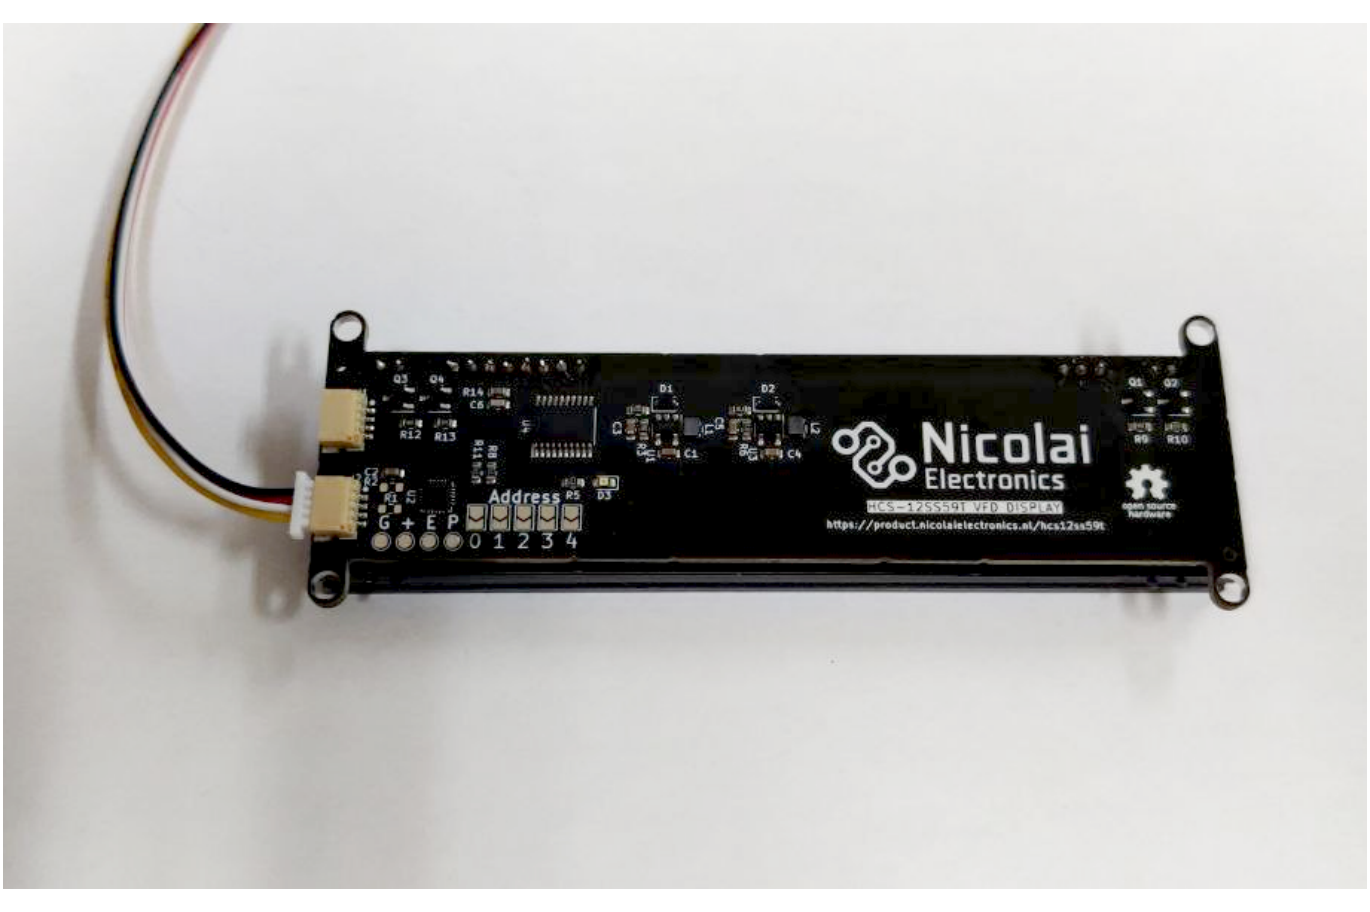
A Samsung HCS-12SS59T 12 character vacuum fluorescent display connected to a custom driver board which takes away all the difficulties of using such a display. The driver board does everything for you, from step-up voltage generation to having a microcontroller that translates between the display and an easy to use I2C interface.
Why did you make it?
I like weird and wonderful displays and this display deserves a spot in cool DIY projects. Unfortunately it is not exactly plug-and-play for use in Arduino, MicroPython or Raspberry pi projects.
What makes it special?
Everything is handled on-board, from generating the required voltages to handling the display control signals. All you have to do is hook up this module via I2C using the QWIIC / Stemma QT connectors on this board. There is two of them allowing for easy daisy chaining with more displays or other QWIIC/Stemma QT boards.
Sources
The hardware design files can be found in the hardware repository and the firmware can be found in the firmware repository.
How to use the device
The device can be connected to a microcontroller via the standardized QWIIC interface.
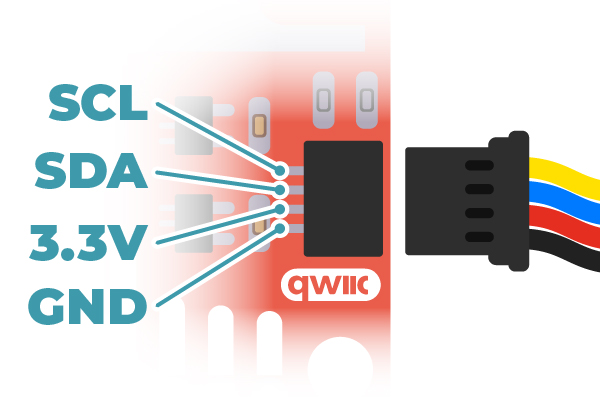
The device is compatible with a supply voltage of 3.3 volt. The I2C interface requires a working voltage of 3.3 volt as well.
I2C interface
The default I2C address is 0x10. The address can be changed by bridging the address jumpers on the board. This allows for modifying the I2C address in the range 0x10 up to 0x2F. Jumper 0 increases the address by 1, jumper 1 increases the address by 2, jumper 3 increases the address by 4 and jumper 4 increases the address by 8.
Register map
| Register | Name | Bit 7 | Bit 6 | Bit 5 | Bit 4 | Bit 3 | Bit 2 | Bit 1 | Bit 0 |
|---|---|---|---|---|---|---|---|---|---|
| 0 | System control | Reserved (0) | Reserved (0) | Reserved (0) | Reserved (0) | Reserved (0) | LED state | Test mode | Display enable |
| 1 | Display offset | Offset bit 7 | Offset bit 6 | Offset bit 5 | Offset bit 4 | Offset bit 3 | Offset bit 2 | Offset bit 1 | Offset bit 0 |
| 2 | Scroll length | Length bit 7 | Length bit 6 | Length bit 5 | Length bit 4 | Length bit 3 | Length bit 2 | Length bit 1 | Length bit 0 |
| 3 | Scroll mode | Reserved (0) | Reserved (0) | Reserved (0) | Loop enable | Mode bit 3 | Mode bit 2 | Mode bit 1 | Mode bit 0 |
| 4 | Scroll speed LO | Speed bit 7 | Speed bit 6 | Speed bit 5 | Speed bit 4 | Speed bit 3 | Speed bit 2 | Speed bit 1 | Speed bit 0 |
| 5 | Scroll speed HI | Speed bit 15 | Speed bit 14 | Speed bit 13 | Speed bit 12 | Speed bit 11 | Speed bit 10 | Speed bit 9 | Speed bit 8 |
| 6 | Reserved (0) | Reserved (0) | Reserved (0) | Reserved (0) | Reserved (0) | Reserved (0) | Reserved (0) | Reserved (0) | Reserved (0) |
| 7 | Reserved (0) | Reserved (0) | Reserved (0) | Reserved (0) | Reserved (0) | Reserved (0) | Reserved (0) | Reserved (0) | Reserved (0) |
| 8 | Reserved (0) | Reserved (0) | Reserved (0) | Reserved (0) | Reserved (0) | Reserved (0) | Reserved (0) | Reserved (0) | Reserved (0) |
| 9 | Reserved (0) | Reserved (0) | Reserved (0) | Reserved (0) | Reserved (0) | Reserved (0) | Reserved (0) | Reserved (0) | Reserved (0) |
| 10 - 255 | Data (ASCII) | Reserved (0) | ASCII bit 6 | ASCII bit 5 | ASCII bit 4 | ASCII bit 3 | ASCII bit 2 | ASCII bit 1 | ASCII bit 0 |
Scrolling modes
0 = Scrolling disable
1 = Scroll left (increment display offset)
2 = Scroll right (decrement display offset)
Usage
Basic usage
At power on the display is automatically enabled. Writing ASCII text to registers 10 through 255 will make the text appear on the display.
To move the position in the buffer which is shown on the display you can write an offset to register 1 (display offset).
System control
To turn off the display write 0 to bit 0 of register 0, to turn on the display write a 1 to bit 0 of register 0. The LED can be controlled using bit 2 of register 0.
Scrolling
The automatic scrolling feature automatically updates the value of register 2 (display offset) to make the text shown on the display scroll without interaction by the bus master.
To enable automatic scrolling first write the maximum value the offset register should reach by setting the value of register 2 (scroll length). To stop scrolling once the last character of a string of text is shown on the rightmost position of the display set the value of this register to the length of the string minus 12 (the amount of characters the VFD can display).
Then write the speed at which you wish the characters to scroll into registers 4 and 5. This value is a 16-bit number representing the amount of milliseconds to wait before moving to the next character.
If scrolling was used before then resetting the current display offset to 0 makes sure the display starts scrolling from the beginning of the text.
To start scrolling write 1 to register 3. This will cause the text to scroll to the left automatically. Scrolling will stop once the scroll length value is reached. To automatically reset to the start of the string the loop function can be enabled by writing 17 (16, loop enable + 1, scroll left) to register 3.
For better readability adding 12 spaces to the front of the string to be scrolled is adviced, this makes the scrolling text start by scrolling in from the right into a blank screen.
Example Arduino sketch
The following Arduino sketch shows basic usage and how to use the built-in automatic scrolling features of the product.
// This example sketch may be freely used and considered in the public domain
// in countries where releasing code into the public domain is not possible
// this code may be used under the terms specified in the CC0 license
// https://creativecommons.org/public-domain/cc0/

#include <Wire.h>

#define VFD_REG_CTRL         0
#define VFD_REG_OFFSET       1
#define VFD_REG_SCROLL_LEN   2
#define VFD_REG_SCROLL_MODE  3
#define VFD_REG_SCROLL_SPEED 4
#define VFD_REG_DATA         10

#define VFD_SCROLL_DISABLE   0
#define VFD_SCROLL_LEFT      1
#define VFD_SCROLL_RIGHT     2

const int16_t I2C_ADDR = 0x10;

// Functions for reading and writing

void vfd_read_regs(uint8_t reg, uint8_t* val, uint8_t len) {
  Wire.beginTransmission(I2C_ADDR);
  Wire.write(reg);
  Wire.endTransmission(false);
  Wire.requestFrom((uint8_t) I2C_ADDR, (uint8_t) len);
  for (uint8_t index = 0; index < len; index++) {
    val[index] = Wire.read();
  }
  Wire.endTransmission();
}

void vfd_read_reg(uint8_t reg, uint8_t* val) {
  vfd_read_regs(reg, val, 1);
}

void vfd_write_regs(uint8_t reg, uint8_t* val, uint8_t len) {
  Serial.print("I2C write to register " + String(reg) + ": ");
  Wire.beginTransmission(I2C_ADDR);
  Wire.write(reg);
  for (uint8_t index = 0; index < len; index++) {
    Serial.print(String(val[index], HEX) + ", ");
    Wire.write(val[index]);
  }
  Serial.println();
  Wire.endTransmission();
}

void vfd_write_reg(uint8_t reg, uint8_t val) {
  vfd_write_regs(reg, &val, 1);
}

// Functions for using the control register

void vfd_control_led(bool state) {
  uint8_t val = 0;
  vfd_read_reg(VFD_REG_CTRL, &val);
  Serial.println("LED, READ  " + String(val, HEX));
  val &= ~(1 << 2); // Turn off the LED
  if (state) {
    val |= (1 << 2); // Turn on the LED
  }
  Serial.println("LED, WRITE " + String(val, HEX));
  vfd_write_reg(VFD_REG_CTRL, val);
}

void vfd_control_test(bool state) {
  uint8_t val = 0;
  vfd_read_reg(VFD_REG_CTRL, &val);
  val &= ~(1 << 1); // Turn off the test mode
  if (state) {
    val |= (1 << 1); // Turn on the test mode
  }
  vfd_write_reg(VFD_REG_CTRL, val);
}

void vfd_control_enable(bool state) {
  uint8_t val = 0;
  vfd_read_reg(VFD_REG_CTRL, &val);
  val &= ~(1 << 0); // Turn off the VFD
  if (state) {
    val |= (1 << 0); // Turn on the VFD
  }
  vfd_write_reg(VFD_REG_CTRL, val);
}

void vfd_control(bool enable, bool test, bool led) {
  uint8_t val = 0;
  if (enable) {
    val |= (1 << 0);
  }
  if (test) {
    val |= (1 << 1);
  }
  if (led) {
    val |= (1 << 2);
  }
  vfd_write_reg(VFD_REG_CTRL, val);
}

// Functions for using the scroll features

void vfd_set_offset(uint8_t offset) {
  vfd_write_reg(VFD_REG_OFFSET, offset);
}

void vfd_set_scroll_length(uint8_t len) {
  vfd_write_reg(VFD_REG_SCROLL_LEN, len);
}

void vfd_set_scroll_mode(uint8_t scroll_mode, bool scroll_loop) {
  uint8_t val = scroll_mode & 0x0F;
  if (scroll_loop) {
    val |= (1 << 4);
  }
  vfd_write_reg(VFD_REG_SCROLL_MODE, val);
}

void vfd_set_scroll_speed(uint16_t scroll_speed) {
  uint8_t values[2];
  values[0] = (scroll_speed) & 0xFF;
  values[1] = (scroll_speed >> 8) & 0xFF;
  vfd_write_regs(VFD_REG_SCROLL_SPEED, values, sizeof(uint16_t));
}

// Functions for using the text buffer

void vfd_write_text(String text) {
  // This function writes an ASCII string into
  // register 10 to 255

  const size_t max_len = 245; // can store text in registers 10 to 255
  size_t len = text.length();

  if (len > max_len) {
    // Silently limit the length of the string
    len = max_len;
  }

  Wire.beginTransmission(I2C_ADDR);
  Wire.write(VFD_REG_DATA);
  for (size_t index = 0; index < len; index++) {
    Wire.write(text[index]);
  }
  Wire.endTransmission();
}

// Functions for Arduino program

void setup() {
  Serial.begin(115200);

  Serial.println("Initialize I2C bus");
  Wire.begin(); // Initialize the I2C bus

  // Configure the display and show a message
  Serial.println("Configure the display and show a message");
  vfd_set_scroll_mode(VFD_SCROLL_DISABLE, false); // Disable scrolling
  vfd_set_offset(0); // Move to beginning of text buffer
  vfd_write_text("Hello world ");
  vfd_control(true, false, true); // Turn on VFD and LED
  delay(1000); // Wait a bit

  Serial.println("Demonstrate scrolling");
  String text = "            The quick brown fox jumps over the lazy dog 0123456789 !@$%^&*()-_=+";
  vfd_write_text(text);
  vfd_set_scroll_length(text.length() - 12); // Scroll until the last character of the string is on the most right character of the display
  vfd_set_scroll_speed(100); // Scroll one character every 100ms
  vfd_set_scroll_mode(VFD_SCROLL_LEFT, false); // Scroll left then stop
  vfd_control_led(false);
  delay(10000);

  vfd_set_scroll_mode(VFD_SCROLL_RIGHT, false); // Scroll right then stop
  vfd_control_led(true); // Turn on LED
  delay(10000);

  vfd_set_scroll_mode(VFD_SCROLL_LEFT, true); // Scroll left then loop
  vfd_control_led(false); // Turn off LED
  delay(20000);

  vfd_set_scroll_mode(VFD_SCROLL_DISABLE, false); // Disable scrolling
  vfd_write_text("            "); // Clear screen
  vfd_set_offset(0); // Move to beginning of text buffer
  vfd_control_led(true); // Turn on LED

  Serial.println("Starting counter loop");
}

uint32_t counter = 0;
void loop() {
  // Count as fast as we can
  vfd_write_text(String(counter));
  counter++;
}
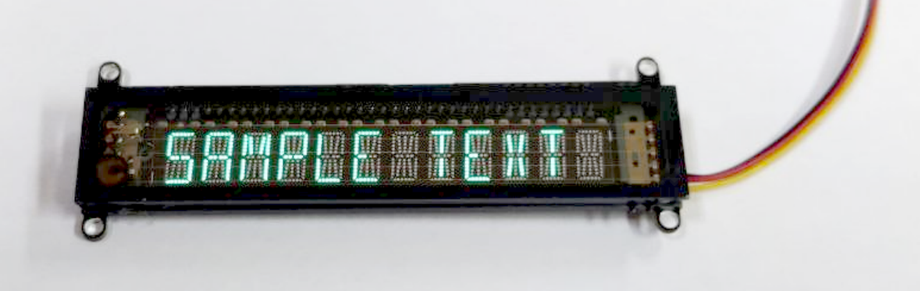
What does it look like?